How To Stream Your Gameplay On Twitch
Hello, fellow gamers! First up, streaming on Twitch can be as straightforward or as complex as you want it to be, but having the right tools and setup is crucial for success. Welcome to your starter pack!
Essentials include a reliable PC. Ensure your machine can handle your game and streaming software running simultaneously. Aim for at least an Intel Core i5 processor or AMD equivalent, 8GB RAM, and a decent graphics card. The better the specs, the smoother the stream.
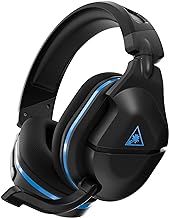
A good microphone is a must. Viewers might forgive dodgy visuals, but poor audio can be a deal-breaker. USB mics like the Blue Yeti or AT2020 are great starter options. If you want to dive deeper, consider XLR mics with an audio interface for better quality. You can consult Amazon to purchase the mic you need for your work. I use a Turtle Beach Stealth 600 combination headset and mic which works just fine.

A webcam is ideal for those who want that personal touch. The Logitech C920 is a solid choice for most beginners. Natural lighting can do wonders, but consider grabbing a ring light for consistent results.
For software, OBS (Open Broadcaster Software) and Streamlabs OBS are popular, and they are free choices. Both offer robust features and customization options. Download, install, and get comfortable navigating through the settings.
It’s time to create your Twitch account. Head to the Twitch website, sign up and fill out your profile details. Remember, your profile picture and bio are the first things new viewers will notice, so make them count.
Lastly, know the community guidelines. Twitch has specific rules to ensure everyone has a good time. Familiarize yourself with these to avoid any unexpected bans. Nobody wants their account suspended mid-stream!
Setting Up Your Stream: Configuration and Optimization
With your gear sorted, it’s time to set up your stream for smooth sailing. Your software choices will play a big role here, so let’s walk through it together.
Start by downloading and installing your streaming software. OBS and Streamlabs OBS are both solid options; head to their websites and follow the easy installation steps. Once installed, get ready to get acquainted with the interface—don’t worry, it’s not as complicated as it looks.
Scenes and sources are the backbone of your stream’s visual layout. A scene is a collection of sources, like your game capture, webcam, and overlays. Create a few scenes for different purposes, like your gameplay, a chatting screen, and a BRB (Be Right Back) screen. Add sources within these scenes to display your content. OBS and Streamlabs OBS make this pretty easy with drag-and-drop interfaces.
Optimal settings matter. For video, set your output resolution to 720p or 1080p. Bitrate typically ranges from 2500 to 6000 kbps depending on your internet speed. Audio should be crisp; balance your game sound and microphone levels in the settings.
Customization is your friend here. Adding overlays, alerts, and widgets can make your stream visually appealing and closer to your brand. Websites like Nerd or Die and Streamlabs offer free or paid overlay packs, so take advantage.
Testing is crucial. Do a few trial runs to make sure everything’s running smoothly. Check for audio syncing issues, dropped frames, and overall stream quality. Also, consider recording a short session to review it and tweak settings as needed.

Building and Engaging Your Audience on Twitch
Consistency is key. A regular streaming schedule helps your viewers know when to tune in. Pick days and times you can stick to, and let your audience know through your Twitch profile or social media.
Viewer interaction builds community. Engage with people in your chat—ask questions, respond to comments, and make them feel valued. Twitch’s moderation tools can also help manage the chat and keep things friendly.
Content matters. Choose games or activities that excite you and your audience. Themed streams, special events, or casual ‘Just Chatting’ sessions can spice things up. Keep an eye on what other streamers are doing to get some inspiration.
Social media works wonders. Promote your stream on Twitter, Instagram, or even TikTok. Post clips, announce your schedule, and engage with your followers outside of Twitch. Cross-promotion helps bring in new viewers.
Utilize Twitch analytics. Dive into your stream stats to understand what works and what doesn’t. Pay attention to viewer count trends, chat activity, and peak times. This data can guide you in refining your strategy.
Monetizing Your Twitch Channel
Once your stream is running, let’s talk about making some money. Twitch offers some cool ways to earn while doing what you love.
First up, becoming a Twitch Affiliate or Partner. The Affiliate program is your starting point. It would be best to hit milestones like 50 followers and streaming for eight hours in the past 30 days. Once you’re in, viewers can subscribe to your channel, giving you a cut from Twitch.
Subscriptions are a steady income source. Viewers can subscribe at different tiers, providing you with monthly revenue. Offering subscriber-only perks, like emotes or exclusive content, can encourage more people to support you. Bits are another way to earn. They’re like virtual tips; viewers can cheer you with Bits during your stream, which translates to money for you.
Donations can be set up through platforms like PayPal or Streamlabs. Encourage viewers to donate during your streams. Be genuine when you ask and always show appreciation for their support. Creating engaging content like milestone goals or donor shoutouts can boost donations.

Brand collaborations and sponsorships come next. As you grow, brands might approach you for partnerships. These deals could include sponsored content, giveaways, or wearing branded gear. Always choose collaborations that align with your channel and audience to keep things authentic.
Keeping your community engaged is key to monetization. Update your content regularly, interact with your subscribers, and acknowledge their contributions. Loyal viewers are more likely to keep subscribing and donating.
